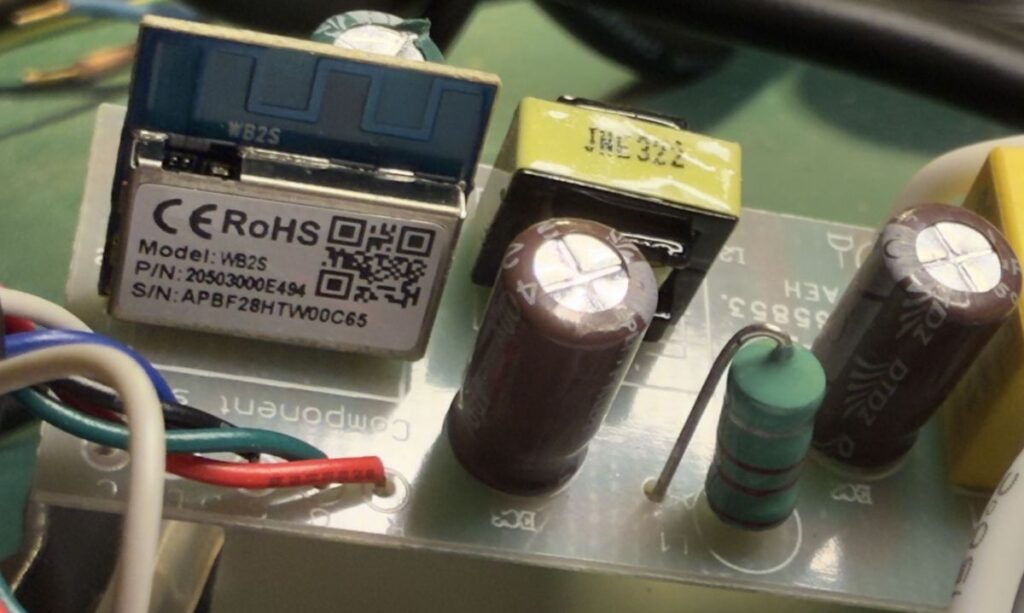
Recently I had the chance to have a look inside a Ledvance smart+ floodlight. The lamp is easy to open without sacrifice the IP65 certification. I recognized that the controller used is similar to the one inside the Lumary Floodlight I reviewed 2 years ago.

This means there are two options to use this floodlight with homeassistant directly without cloud. As in the blog post about the Lumary floodlight it’s possible to replace the controller with a ESP-02S Chip and use ESPHome inside homeassistant. The second option is the alternative firmware OpenBeken that is compatible with the WB2S chip and can be integrated with homeassistant or any other mqtt capable smart home.

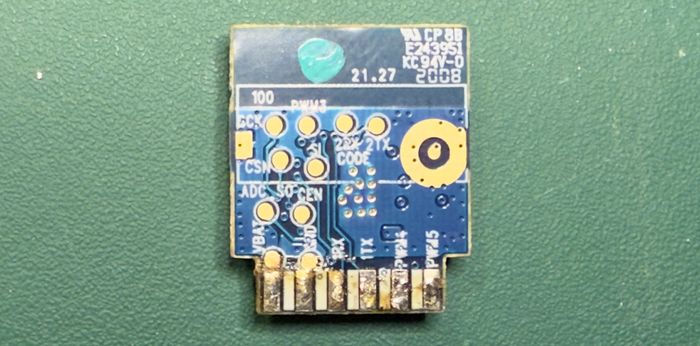
After desoldering the chip, I used my CH340 based UART USB Interface to flash the chip. To connect the the chip, solder the RX, TX, 3,3V (VBAT) and Ground (GND) on the side of the chip with six contacts:

To flash OpenBeken Firmware just download and the flasher and choose the COM port of your interface. On the GitHub site is a very detailed explanation how to flash the firmware: openshwprojects/BK7231GUIFlashTool Basically simply choose the COM port and click on the first button:

When the flasher tries to get the bus, simply reconnect the wires on the interface wich initiates a reboot of the chip. First this procedure creates a backup and the flashes the new firmware after a second chip power cycle.
After successfully flashing the chip, it reboots and starts a dedicated Wifi for initial configuration. Connect to the Wifi with OpenBeken in its name and visit 192.168.4.1 to configure the Wifi the floodlight should connect to. After checking that the new connection is successful, we can disconnect the flash wires and solder the chip back to the floodlight board.
After powering the floodlight back on, you can check in your router for the new IP adress and browse to this IP in the browser.

The first step is, to configure the PWM channels of the chip. This is possible through Config -> Configure Module:

After selecting the correct PWM channels in the correct order it is possible to control the floodlight.
This is my working OpenBeken config:
{
  "vendor": "Ledvance",
  "bDetailed": "0",
  "name": "smart+ Floodlight",
  "model": "SMART OUTD WIFI FLOOD",
  "chip": "BK7231T",
  "board": "TODO",
  "flags": "1024",
  "keywords": [
    "floodlight",
    "rgbw",
    "outdoor"
  ],
  "pins": {
    "6": "PWM;2",
    "7": "PWM;1",
    "8": "PWM;0",
    "26": "PWM;3"
  },
  "command": "",
  "image": "https://obrazki.elektroda.pl/YOUR_IMAGE.jpg",
  "wiki": "https://www.elektroda.com/rtvforum/topic_YOUR_TOPIC.html"
}Adrian
Sources:
LEDVANCE Wifi SMART+ Outdoor LED Strahler mehrfarbig RGBW dimmbar 10W
Using a Lumary Smart RGBW Flood Light with ESPHome – Cloudkumpel
Schreibe einen Kommentar