Hey folks,
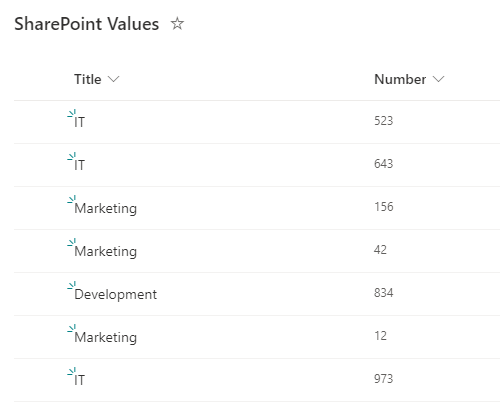
today we will learn how to turn SharePoint values into columns. This is just a simple example of a SharePoint list with some information (could be single line of text or choice, choice would be better to make sure your values are always written the same).
Switch over to Power Automate. Choose a trigger based on your need, in this case we want to trigger the flow manually, so we are using the “Manually trigger a flow” trigger.
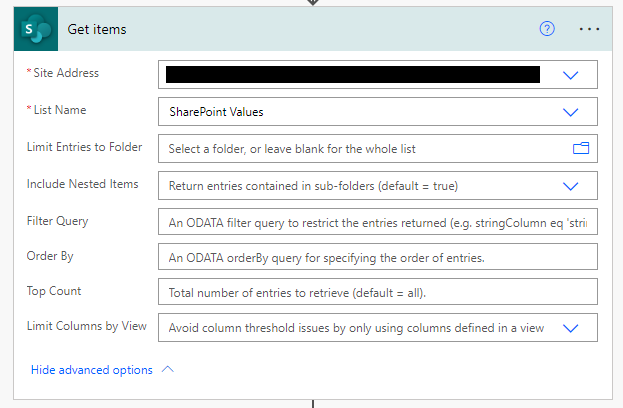
First we need to get the all items from the SharePoint list:
Next we want to select just the values from the columns “Title”. We could also limit the “Get items” action, but we can use this elements later, so we will use the “Select” action:

Select will get all elements from the “From” array into a new array. To make this values distinct, we will use the “Union()” expression within the “Parse JSON” action, you can of course use a “Compose” action after the “Select” action if you need a sample schema or want to just want to do it step by step.
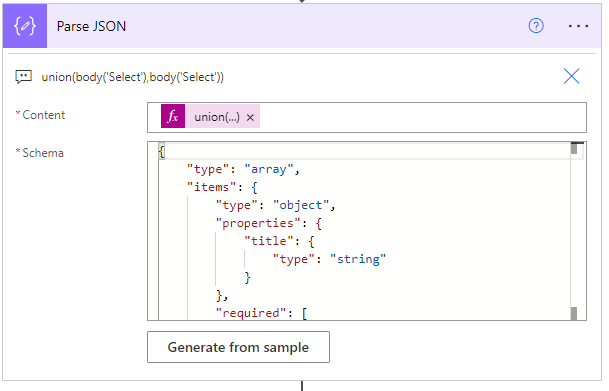
union(body('Select'),body('Select'))
Union returns a single array or object with all the elements that are in either array or object passed to this function. The parameters for the function can either be a set of objects or a set of arrays (not a mix of both). If there are two objects with the same name in the final output, the last object with that name appears in the final object. We union the array we receive from “Select” with itself, which will return us a distinct array.
This is our basis, we can now go on and create SharePoint columns, Excel table, Planner buckets or anything else.
SharePoint columns
To create a SharePoint column, we need to use the SharePoint HTTP action:

Site Address: <Your SharePoint Site Collection>
Method: POST
Uri: _api/web/lists(guid'<Your List ID>')/Fields
Headers:
    Accept          Application/json;odata=verbose
    Content-Type    Application/json
Body:
    {
        "Title": "items('Apply_to_each_2')['title']",
        "FieldTypeKind": 2,
        "Required": "false",
        "EnforceUniqueValues": "false"
    }
The “Apply to each” action will be created automatically, when you select the dynamic value from “Parse JSON”. You can find your List ID, when you switch over to SharePoint, click on the gear wheel in the right upper corner and select “List settings”. Now check your URL bar, you will see something like:
https://<your tenant domain>.sharepoint.com/sites/<your site collection>/_layouts/15/listedit.aspx?List=%7B<Your List ID>%7D
Just copy all the content between %7B and %7D. “FieldTypeKind”: 2 is a single line of text column. You can find more values in this list: Microsoft Docs – SharePoint Field Type Values, here is also a selected list of some FieldTypes:
| Type | Value |
|---|---|
| text | 2 |
| DateTime | 4 |
| Choice | 6 |
| Boolean | 8 |
| Number | 9 |
Watch out, all FieldTypes require different settings, when being created. To learn more about the SharePoint REST service, check out this: Microsoft Docs – Get to know the SharePoint REST service.
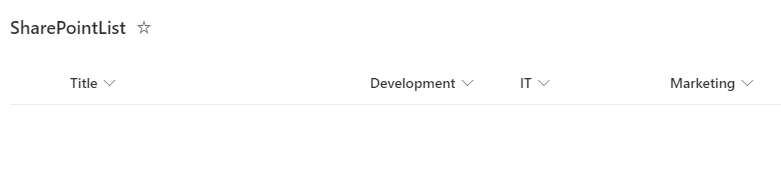
Let your flow run and your SharePoint columns will be created:
You should consider to first check, if the columns are already created and show the columns within the view, but this will be part of another blog article.
Create an Excel table with columns
Of course you can also create a table within an Excel file from your SharePoint values. This gets a bit more complex, because we need to prepare a couple more things, before we can create the table.
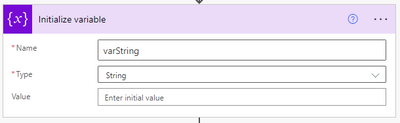
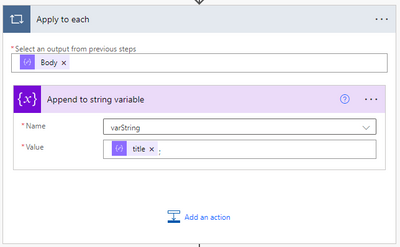
To create columns within excel, you would need it in a specific format, so you can append every column name from the array into the a string variable. Just create a new variable somewhere in the beginning (usually the best is after the trigger) and choose the “Append to string variable” action. The “Parse JSON” will give you the option to select the values from the “dynamic value” section. The “apply to each” will be created automatically, when you select “title” from the “dynamic values”:
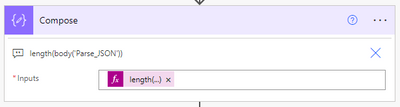
We also need to define the table range, to do this, you can use the “length()” expression to get the number of items within the distinct array:
Unfortunately there is no such function “char()” as in Power Apps, that enabled us to transform decimal into the corresponding ASCII character, to we cannot calculate the letter and need to use combined “if()” expressions. You can either use a “Compose” action or a variable to save this letter in:

if(
    equals(outputs('Compose'),1), 'A',
    if(
        equals(outputs('Compose'),2), 'B',
        if(
            equals(outputs('Compose'),3), 'C', 'D'
        )
    )
)
Now we do have all components we need to create the table within Excel. Use the “Create table” action from Excel, select your location and the file, where you want to add this table. Your “table range” is starting at A1 and is ending at column “<Compose 2 value>” and your columns name is your string variable:
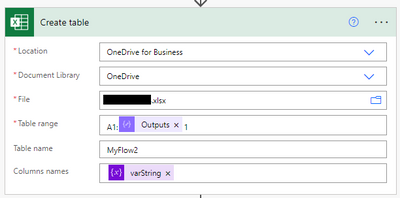
Also the range is first just the headers, so “A1:B1” (as an example). Afterwards you would need to use the Excel action “add a row into a table” to add all of your SharePoint items into the excel file.
Note: it’s pretty difficult to create an Excel file using Power Automate. If you would need a new one every time you should consider to create an empty Excel template and save it somewhere in SharePoint/OneDrive and just create a copy of this file whenever you need it. Also your flow maybe run into problems, if the table range is already taken, therefore it’s probably better to create a new document, because you cannot delete an existing table from Power Automate (maybe using Office scripts, but I did not tested this).
Thanks for reading, I hope it will help you!
Marvin
Schreibe einen Kommentar