Back in the days we used to have wall panels behind our TV to hide some wires and add some cool lighteffects. So we were looking for some new panels for our new living room. SInce we dont want to use the fractal design again, it was not that easy to find our new panels until I’ve got an inspiration from Thingiverse. Thanks to User GrowFlawor who wrote about how to print a surface model of the moon.
So the idea of printing wall panels with the surface of the moon was born. I wanted to print wall panels with a size of 20x20cm each to cover an area of 180x80cm.
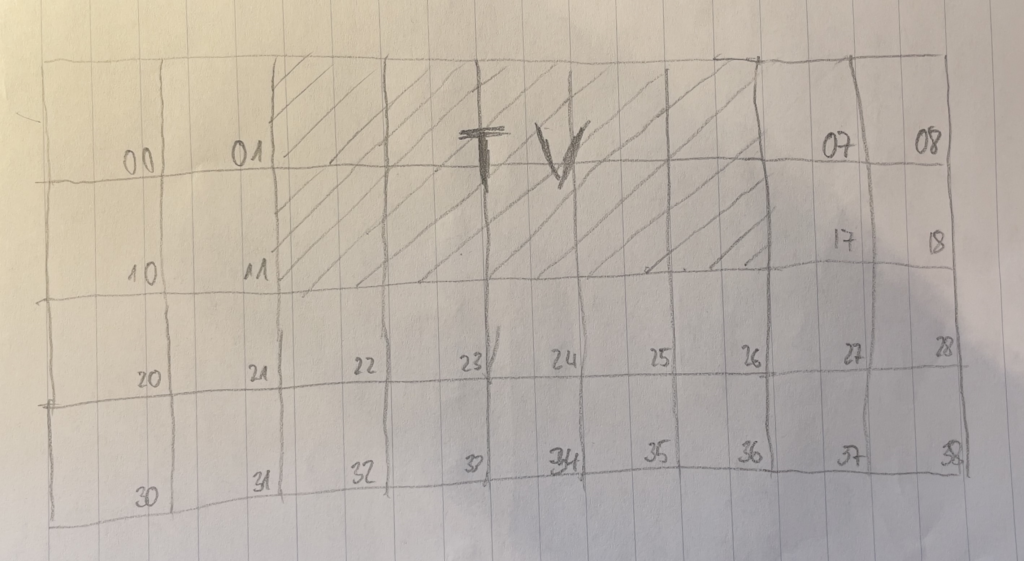
So the result was a grid with 4×9 panels. In the upper two rows the TV covers some panels so we do not need to print all nine in these rows.
I started directly to export panels with the Nasa Moon Trek Website.
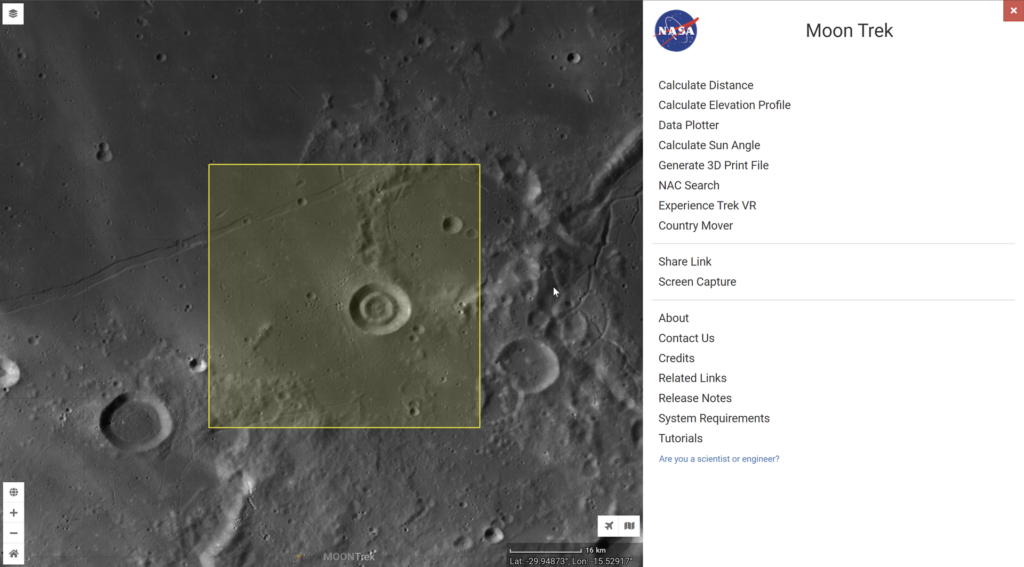
The moon trek website allows you to select an area, choose an exaggaration and export it as stl file.
I run into two issues:
#1 Issue
It is obvious that using vase mode is not the best way to print wall panles that need to be kind of solid to bring the to the wall. In my opinion the „Standard“ profile took too much time for a panel and uses too much filament. So I started to build my own wall panel cura profile. Aim was quick as possible print time and economical use of filament while keeping it solid to glue it on the wall.
#2 Issue
In addition to that, it is only possible to export selected areas one by one and the surface exaggaration is calculated per export. The height exaggaration is used to make the surface more distinct. As a result the height of my test prints did not fit to each other.
#1 Solution
My approach to the solution of issue one was kind of trial and error especially since i am relatively new to 3d printing. But in the end ive got a cura profile that prints a panel in under 12 hours using between 50g and 100g PLA filament.
You can find the profile here: Download
#2 Solution
In theory the solution was easy: Simply calculate the exaggaration for the complete 4×9 panel area at once. So I needed a new way to select and export the moon surface model. After some research I found moon digital elevation models (DEM) for free download and that there is a 3d export plugin for QGIS. My first problem regarding QGIS was, that the stl file export via DEMto3D does not seem to work at all. After some more research I found a hint on Stack Exchange, that this is an issue of the current QGIS version and should work with the last LTS version (v3.2.8 at the time of writing). The use of the version was the solution to my problem too. The next step was to find the best fitting DEM file. There are several files available, but I ended with the northpole model with 30m resolution.
Export STL files with QGIS from DEM
After downloading the DEM file I downloaded QGIS Version 3.28.0 and installed it. Then create a new project an load the DEM file.
The next step is the klick on extensions and the installation of the DEMto3D extension from the list:
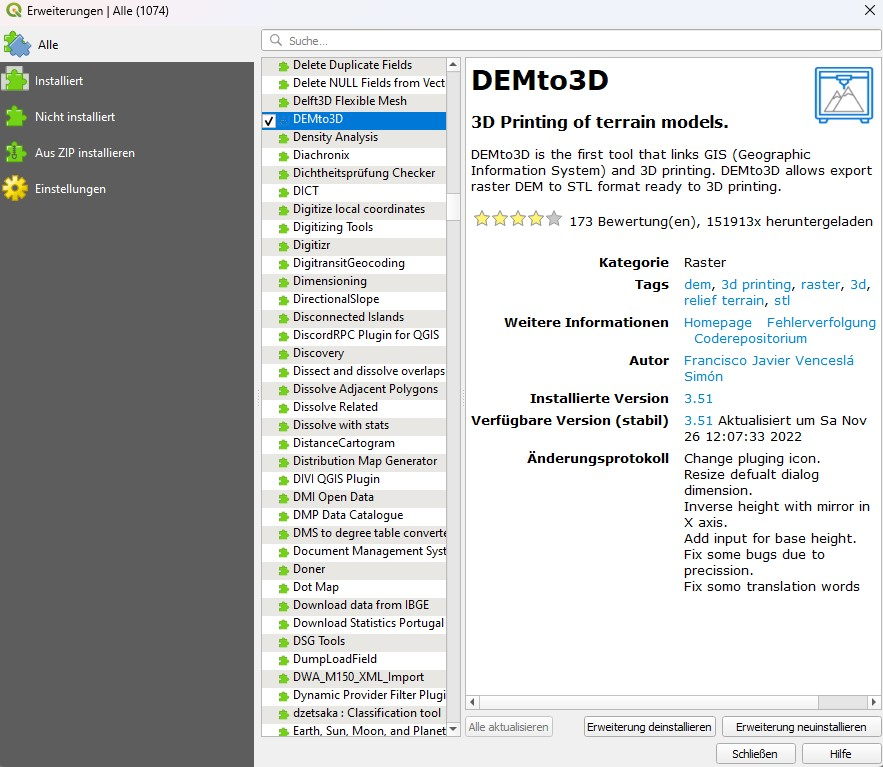
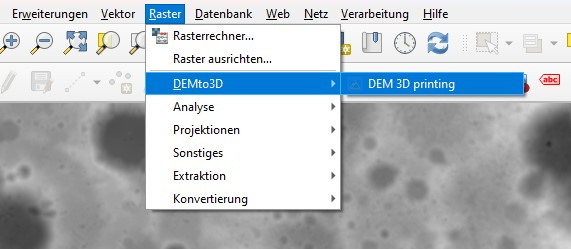
After successfull installation, the DEMto3D Plugin can be used from the „Raster“ menu.
The DEMto3D dialog allows you to select the area to export and how the area should be splited:
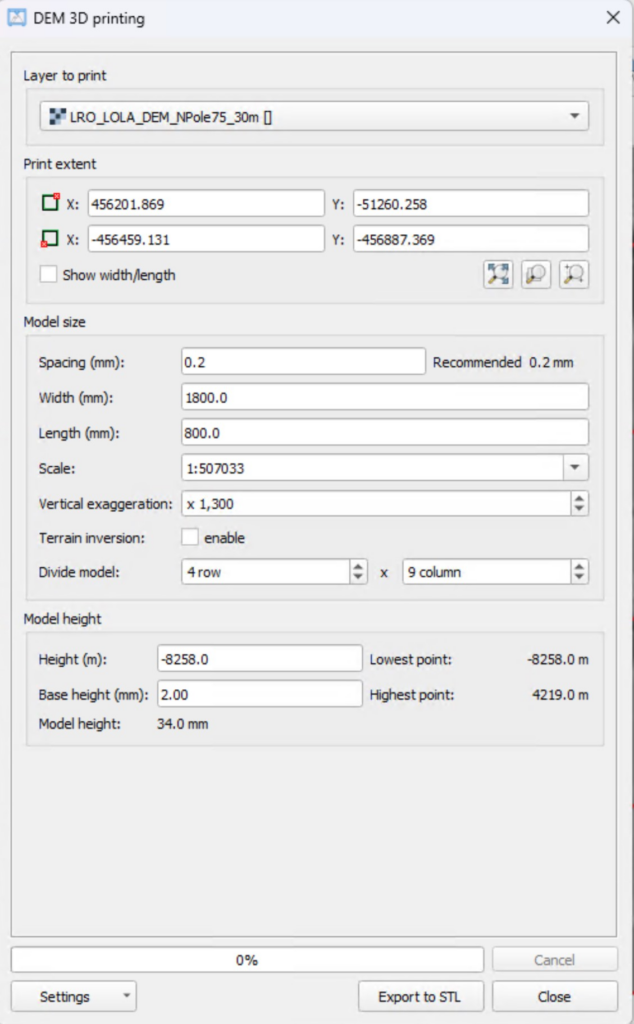
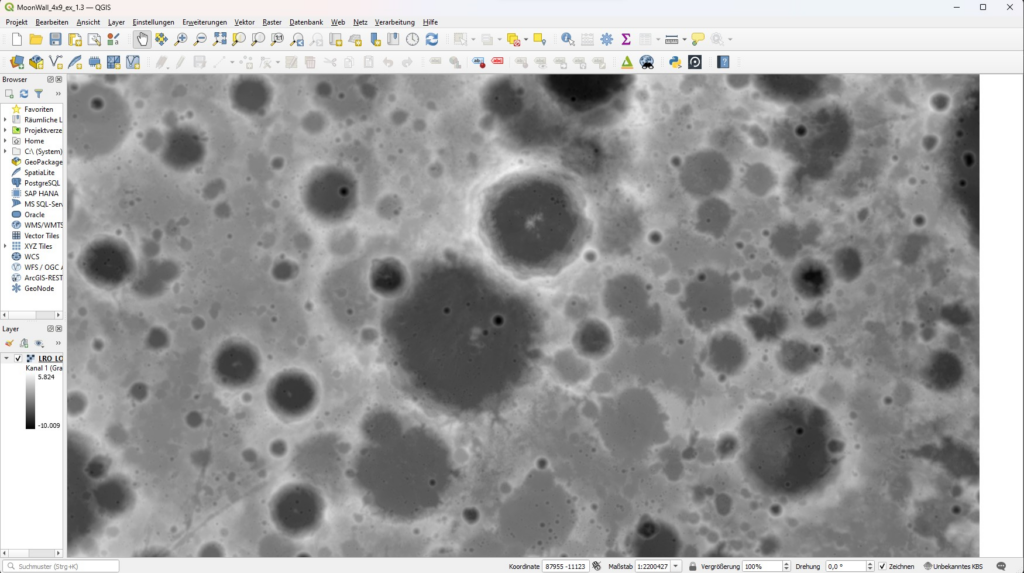
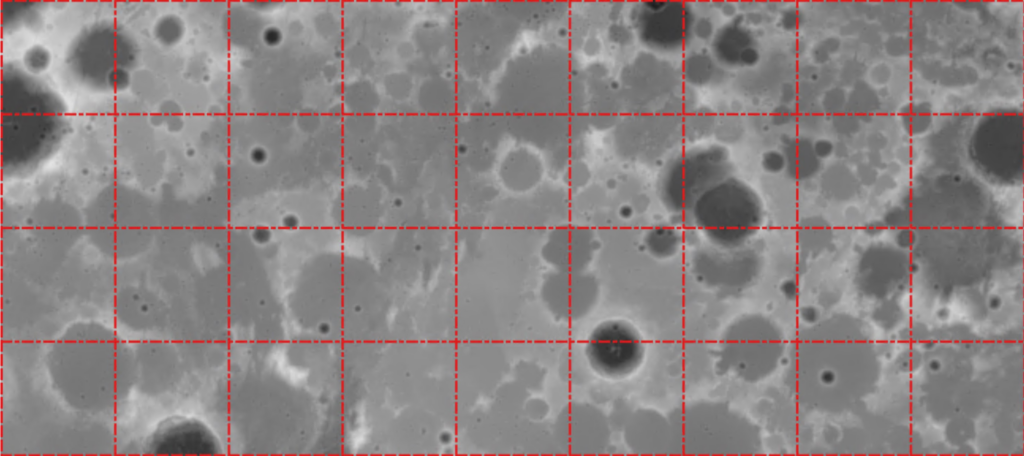
To me it was important to be able to choose the „Divide mode“, in my case 4rows and 9 columns. With the „Vertical Exaggaration“ we are able to control the total height of the model. The resulting selected area is marked mith red lines in the DEM:
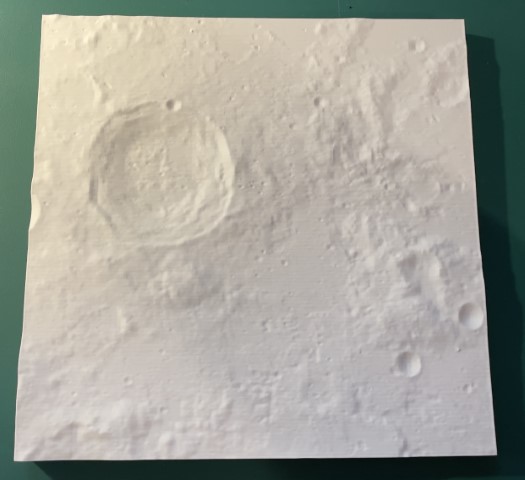
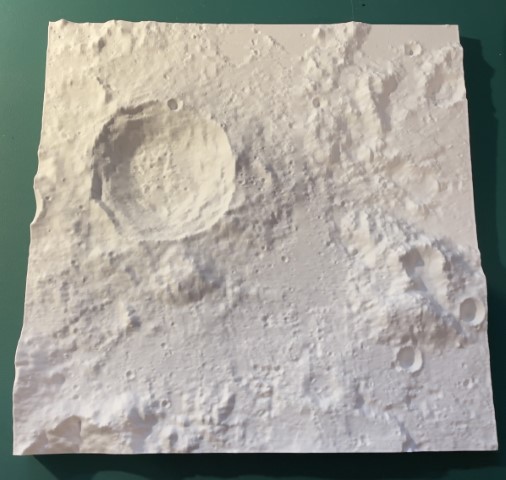
The export job takes some time and produces an stl file per panel. In my case 36 stl files with a size of ~200mb per file. I printed the the panel fliped 90° so it stands upright on the printbed.
DEMto3D numbers the exported files per row and panel. So I have to print the following numbers, the red Xs mark the panels I do not need to print because they would be hidden by the TV.
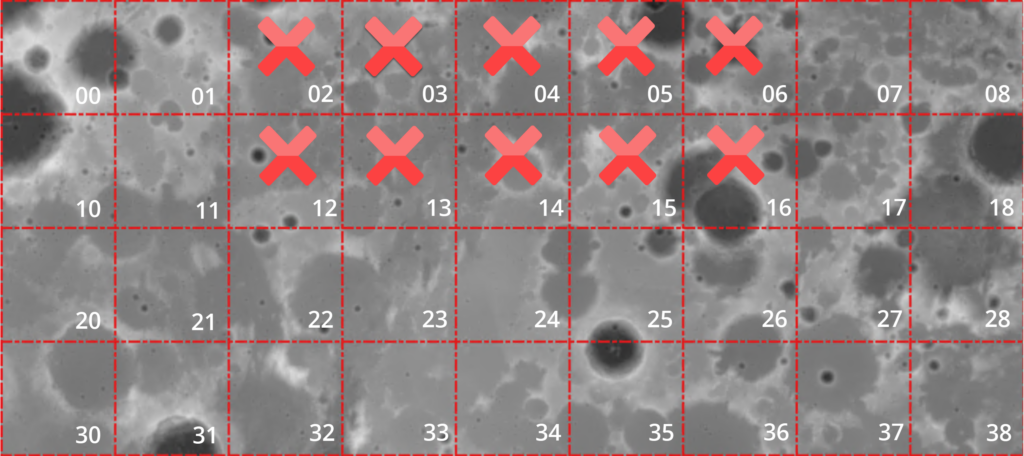
The result is 26 panels I have to print. My experience and learnings printing the panles will be part of part 2 of the blog series followed by the result „on the wall“ in part 3.
So keep an eye on the blog if your’e interested and
Glück Auf
Sources:
Most easy way to export STL files: Moon2STL: Print the Moon (jthatch.com)
Nasa Moon Trek: Moon Trek (nasa.gov)
QGIS Homepage: Welcome to the QGIS project!
QGIS / DEMto3D STL Export Bug: qgis – Moon surface 3D print model (DEMto3D plugin) – STL not generated – Geographic Information Systems Stack Exchange
Nasa Moon DEM (Digital Elevation Model): Moon LRO LOLA DEM 118m v1 | USGS Astrogeology Science Center
DEM file that I used (LRO_LOLA_DEM_NPole75_30m.tif): https://astropedia.astrogeology.usgs.gov/downloadBig/Moon/LRO/LOLA/ancillary/LRO_LOLA_DEM_NPole75_30m.tif
Schreibe einen Kommentar